• Welcome to the CaliforniaSpecial.com forums! - You are currently viewing the forums as a GUEST. To take advantage of all our site features, please take a moment to join our community! It's fast, simple and absolutely free.

    If you have problems registering or can't log into your account, please contact Admin.

    Please Note: If you are an existing member and your password no longer works, click here to reset it.

1968 Trunk CS stripe application

murf104

Well-known member
Joined
Feb 2, 2003
Messages
274
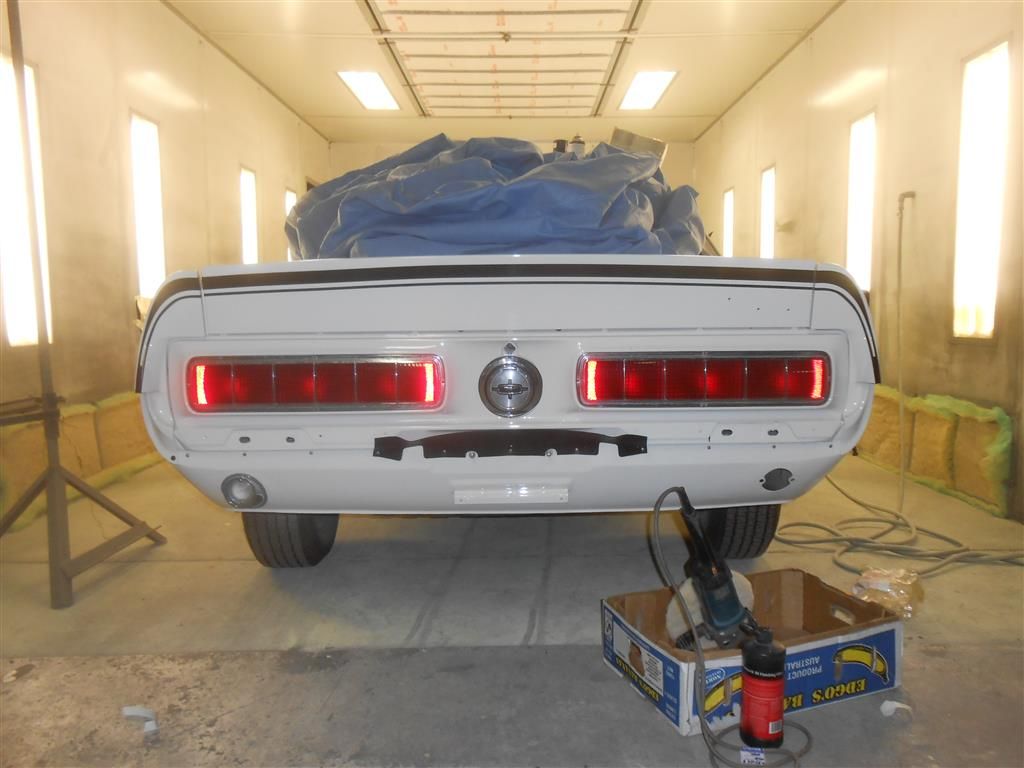
The time has come to begin thinking about installing the CS stripes on the trunk and quarter extensions. I can see that the trunk is curved and the stripe kit is straight so the task will be more difficult. Putting a curve in a straight piece of vinyl means only one thing to me - PUCKERS! So asking for hints of advice on how to do this without ruination of a stripe kit. How does one go about following the curvature of the trunk lid without getting wrinkles in the stripe. This will be the last part of the "stripe adventure" and the attempt will after the final buff of the deck lid. Thanks for any help you may offer.
 

limelyt

Well-known member
Joined
May 24, 2006
Messages
308
Location
Calgary, Alberta CANADA
we did not find any problem installing the strips as curve is very subtle. Had no issues with wrinkles. Just make sure the distance between the top of the trunk and first strip is 7/8"

Gary
 

Ruppstang

Well-known member
Joined
May 22, 2009
Messages
3,078
It can be challenging because you can not use soapy water, you must do it dry to follow the arc. Mark it out and take your time.
 

dalorzo_f

Well-known member
Joined
Jan 7, 2006
Messages
1,886
Location
Brisbane Australia
I have not started this, but in "pondering" while working the sides I will cut the backing into short sections and work from the center out after hinge-taping in place (in about 20 places to hold the curve!). Remove 6-8" sections of backing at a time, work that flat, then move outward.

I figure that way if it stretches at all I can shift the outside towards the end caps as I go to avoid blips.
 

dalorzo_f

Well-known member
Joined
Jan 7, 2006
Messages
1,886
Location
Brisbane Australia
Just did it today. Came out "good" but dry did not lie as flat as the GTCS scoops I did wet.

I hinged it marking a dot at the 7/8" down from he edge on the tape at about 6" increments. I split the backing in the middle, folded open about 6" and pulled the backing out the bottom at an angle to continue. Pulled off about 6"-8" of backing untaped it then pulled to each mark and laid it down lightly. Then double checked against the mark. You can lift to realign if you need to before squeegeeing (I used a piece of thick rubber wrapped in a rag). Some small bubbles/blips just refused to come out so think wet might allow it to lie better. The surface was immaculate, buffed and cleaned just prior to applying.

Did the end caps similarly. Folded the ends split the middle and started from there, middle down, then middle up. They went on really well.


franklinair

Well-known member
Joined
Mar 1, 2007
Messages
4,744
Not having done the decklid stripe installation, why can it not be done 'wet' like the rest of the striping??

Neil
 

Mosesatm

Well-known member
Joined
Jan 18, 2005
Messages
9,172
Probably because you wrote this "Just did it today. Came out "good" but dry did not lie as flat as the GTCS scoops I did wet."

I think Neil is asking why you decided to install the rear stripe dry instead of wet.
 

dalorzo_f

Well-known member
Joined
Jan 7, 2006
Messages
1,886
Location
Brisbane Australia
Was referring to the prior comment that "you can't do it wet"... post #3 above.

I tried it dry as there are different opinions on the issue on various posts/forums...
 
OP
OP
M

murf104

Well-known member
Joined
Feb 2, 2003
Messages
274
Richard, sure wish that our trunk lid fit as well as yours. I hesitate to apply the stripes since the lid fits like " socks on a rooster". Thinking about yanking the correct weather strip from the trunk lid and then apply the soft foam Shelby weather strip and see if the fit improves. Ours is just too high compared to the quarter panel end caps and after sitting shut for 6 weeks it hasn't changed any - still hard if not nearly impossible to shut and still way too high. Back to the drawing board on that aspect of assembly!
 

dalorzo_f

Well-known member
Joined
Jan 7, 2006
Messages
1,886
Location
Brisbane Australia
Well, the lid does (typically, from what I gather) sit up a good 1/4"-3/8" above the end caps if you run a line across the top of the two... fades out with the bright backlights in the booth... but thanks!!
 
Top