Jester
Well-known member
Hi,
Winter and its time for next step of restoration. Last winter I rebuilt the grille which was standard 68 and made a nice replica of the original and also changed grille mouldings, painted the grille and mouldings and pedestals, fitted the correct Lucas lights and fixed electrical wiring so the lights actually works.
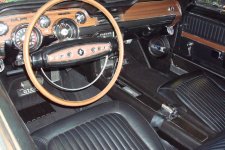
This winter I am planning to change the seat covers, steering wheel and a few other interior things that are beyond recovery. I really enjoy driving my car during the summers and I'd like to have it on the road again by april, so the restorations I do, I keep small.
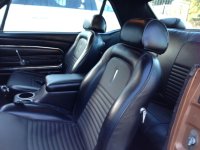
So my question is. Is changing seat covers something I can sort myself without previous experience? or is it something best left to a professional? I havent been long in this hobby, but I am not a stranger to a wrench either.
Advice is appreciated. If anyone has step by step instructions for how to remove the backseat and cover and refit it it would be even better.
Thanks a lot /Jesper
Winter and its time for next step of restoration. Last winter I rebuilt the grille which was standard 68 and made a nice replica of the original and also changed grille mouldings, painted the grille and mouldings and pedestals, fitted the correct Lucas lights and fixed electrical wiring so the lights actually works.
This winter I am planning to change the seat covers, steering wheel and a few other interior things that are beyond recovery. I really enjoy driving my car during the summers and I'd like to have it on the road again by april, so the restorations I do, I keep small.
So my question is. Is changing seat covers something I can sort myself without previous experience? or is it something best left to a professional? I havent been long in this hobby, but I am not a stranger to a wrench either.
Advice is appreciated. If anyone has step by step instructions for how to remove the backseat and cover and refit it it would be even better.
Thanks a lot /Jesper