• Welcome to the CaliforniaSpecial.com forums! - You are currently viewing the forums as a GUEST. To take advantage of all our site features, please take a moment to join our community! It's fast, simple and absolutely free.

    If you have problems registering or can't log into your account, please contact Admin.

    Please Note: If you are an existing member and your password no longer works, click here to reset it.

1968 Tips on installing stripes...

dalorzo_f

Well-known member
Joined
Jan 7, 2006
Messages
1,886
Location
Brisbane Australia
A little ways of as color goes back on the car next week... so planning a bit ahead. Never applied these before, anyone got tips-and-tricks...??

Have dimensions from the GT/CS book....
 

Ruppstang

Well-known member
Joined
May 22, 2009
Messages
3,034
Once you have found the locations a laser level works well to get them strait and leaves no marks on the car. Just keep it set on stun and you will be ok. LOL
 

candycal

Active member
Joined
Feb 2, 2011
Messages
26
Location
Perth, Western Australia
Richard, use a spray bottle with water and liquid detergent to wet the decal before applying it. This gives a bit of "slip" for adjustments. There should be a little squeedgy type thing with the kit, use that to press out any air bubbles and excess water. I've done it a few times now, it's not as daunting as it seems.

Tip: Make sure you cut enough to wrap around the front edge of the door and the edge of the fender comfortably. And remember - "measure twice, cut once"!

You can buy some stuff to help apply the decals as well but I don't remember where I saw it (NPD maybe?).
 

x-codegtcs

Well-known member
Joined
Sep 5, 2002
Messages
549
Location
Kaysville, UT
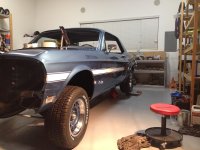
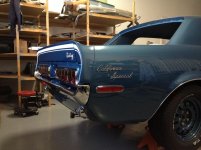
This was my first time too. Make sure all your doors and fenders are aligned before starting - start with the door, then do the scoop. The scoop will need to be off the car to wrap the decal correctly. The dims in the book are not correct for the fender front section - the body line curves down making your stripe nose downward. I ended up having to extrapolate some measurements for reference points and in the end eyeballed it. I used a bucket of soapy water and get the car good and wet (gets rid of dust and lint too), wet my hands and then peel, position, reposition, position again, eyeball, position again, apply. I just used blue masking tape cut in triangles at various points to make sure I stayed on the correct slope. I eyeball it from several angles and distances, then just use an old credit card to squeegee it.

I am not sure what your trunk weather stripping will be like, but mine is refusing to settle very fast. My deck lid is about 3/16" higher than the "from factory" so I figure it is due to the stiffer weatherstripping. I striped my trunk accordingly so it will be in the right place when it finally breaks in.
 

Attachments

  • IMG_3206s.jpg
    IMG_3206s.jpg
    89.6 KB · Views: 45
  • IMG_3215s.jpg
    IMG_3215s.jpg
    233.5 KB · Views: 49

rvrtrash

Well-known member
Joined
Apr 25, 2003
Messages
3,652
I am not sure what your trunk weather stripping will be like, but mine is refusing to settle very fast. My deck lid is about 3/16" higher than the "from factory" so I figure it is due to the stiffer weatherstripping. I striped my trunk accordingly so it will be in the right place when it finally breaks in.

The trunk lids don't fit correctly from the factory, and are high on one side, at least that seems to be the consensus.

Steve
 
OP
OP
D

dalorzo_f

Well-known member
Joined
Jan 7, 2006
Messages
1,886
Location
Brisbane Australia
Thanks again. Interesting on the front dimension, anyone else have the same issue?

On the lid, what weatherstrip did you use? Branda sells a 68 Shelby convertible one that seems a lot softer than the NPD I have... forget the brands. Maybe it will help if the one you have is really that thick/stiff...

But, as noted, most rear deck lids (at least that I have seen) do sit about 1/4" - 3/8" above the end caps...
 

Ruppstang

Well-known member
Joined
May 22, 2009
Messages
3,034
When we striped the HCS we also found the dimensions in the book to be incorrect. I used the Branda Shelby convertible one and it works very well. It take a little work but you can get them adjusted level. The Drake one is the really hard one.
 

somethingspecial

Well-known member
Joined
Aug 13, 2005
Messages
1,795
Keep in mind the factory didn't pay much attention to lazer level straightness. I have seen several cars over the years with the stripes nose diving, just subtle enough to see, but not drastic. Using a Lazer level will ensure you keep the lines straight. The book shows dimensions from the Authors original paint, original factory applied stripes, but who applied them at the factory, the coke bottle glasses flunky. Who knows. The dimensions in the book is a great starting refrence in my opinion, but the lazer level is how I would do it. I would start with the scoop and door, and work my way forward, adjusting as I needed. Remember, you have two short runs on the fender as it is broken up by the wheel well. If you mark the rear of the door where it needs to go, then mark the front of the fender where it needs to go, shoot the level and stand back to see how it looks. JMHO. Mike

ps. Remember to leave 1/2 inch overhang of the stripes at the edges of the fenders and doors. This much wrapped around the edges, including between the front of the fender and the fender extention (head light bucket).
 

Ruppstang

Well-known member
Joined
May 22, 2009
Messages
3,034
Keep in mind the factory didn't pay much attention to lazer level straightness. I have seen several cars over the years with the stripes nose diving, just subtle enough to see, but not drastic. Using a Lazer level will ensure you keep the lines straight. The book shows dimensions from the Authors original paint, original factory applied stripes, but who applied them at the factory, the coke bottle glasses flunky. Who knows. The dimensions in the book is a great starting refrence in my opinion, but the lazer level is how I would do it. I would start with the scoop and door, and work my way forward, adjusting as I needed. Remember, you have two short runs on the fender as it is broken up by the wheel well. If you mark the rear of the door where it needs to go, then mark the front of the fender where it needs to go, shoot the level and stand back to see how it looks. JMHO. Mike

ps. Remember to leave 1/2 inch overhang of the stripes at the edges of the fenders and doors. This much wrapped around the edges, including between the front of the fender and the fender extention (head light bucket).

+1
The book seemed ok on every thing but the fender.
 

x-codegtcs

Well-known member
Joined
Sep 5, 2002
Messages
549
Location
Kaysville, UT
I have seen a lot with the stripes too low on the scoops - looks odd to me. I used the dims on the door and then fit the strips on the scoop to match the door. Since my qtrs were not original, I fiddled with the scoop to make sure that the dim in the book to be close (within 1/8") of where my stripes landed. I found it very hard to start with the scoop due to the rounded corner and top making the dimension reference almost impossible to know where PN measured...so I went door ---> scoop ---> front fender. You are detailed enough, I am sure it will look good when you are done.
 
Top