• Welcome to the CaliforniaSpecial.com forums! - You are currently viewing the forums as a GUEST. To take advantage of all our site features, please take a moment to join our community! It's fast, simple and absolutely free.

    If you have problems registering or can't log into your account, please contact Admin.

    Please Note: If you are an existing member and your password no longer works, click here to reset it.

1968 Measurements for GT/CS side strip

Willy 1

Active member
Joined
Jun 23, 2019
Messages
37
Location
Saskatchewan Canada
Hi can anyone tell me the exact measurements for where to install the stripes on my 1968 GT/CS. I have searched the web and can't find that info anywhere. Looks like they should be centered on the side scoops but not sure. Thanks in advance.
 
OP
OP
W

Willy 1

Active member
Joined
Jun 23, 2019
Messages
37
Location
Saskatchewan Canada
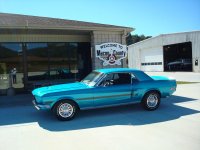
Sorry Neil little out of my price range. The car I am working on is a car that you did the motor on a few years ago, a fellow from Calgary Alberta. Called the car Doug
 

franklinair

Well-known member
Joined
Mar 1, 2007
Messages
4,744
I remember that CS. The engine had a cracked piston when we took it apart. What happened to the stripes?

Neil
 

Attachments

  • Doug8.jpg
    Doug8.jpg
    85.6 KB · Views: 47
OP
OP
W

Willy 1

Active member
Joined
Jun 23, 2019
Messages
37
Location
Saskatchewan Canada
Neil
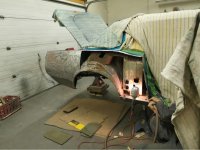
That is correct the previous owner gave me the broken piston skirt when I bought the car. As to why new stripes are needed. You know how some projects start out very small and turn into major undertakings. When I purchased the car I noticed a couple of things that there was a small rust issue with the trunk drop offs and that the car had been in a accident at one time in the rear passenger quarter basically above the wheel. We started on the drop off on the passenger side. Thought the rust was just by the vent hole but turned out we replaced the whole drop off as well as the bottom foot of the quarter panel and the bottom of the outside wheel well. When we started on the wheel well we found lots of bondo, part of the accident repair. So we sanded it all off revealing how the quarter was repaired. Looks like they cut a section out took a portion of a different quarter and brazed it together by overlapping on both sides and covering everything with a lot of bondo. Long story short cut it all out repaired it properly and started looking at the bottom of the driver quarter panel. Same rust but not nearly as bad. So we repaired that side also but by the time we where done had a car with one quarter with hardly any paint and the other about half stripped. So when I was that far along I thought I might just as well strip the whole car and start over, in places there where at least eight layers of paint including primer. Hence the new stripe kit. Lesson learned hope for the best but prepare for the worst. lol
 

franklinair

Well-known member
Joined
Mar 1, 2007
Messages
4,744
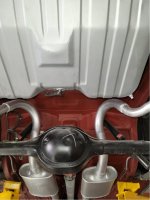
I see the thread info posted by Tequila has the stripe info you need. The photos you sent to me- OUTSTANDING.

Neil
 

Attachments

  • 016.jpg
    016.jpg
    89.4 KB · Views: 54
  • 017.jpg
    017.jpg
    68.2 KB · Views: 53

Tequila

Well-known member
Joined
Sep 29, 2013
Messages
348
Tequila Big thanks for the reply that is the info that I needed. Never thought of doing a search.

No problem. I needed the information as well.

Wow, sounds like a big repair job for you but glad you decided to do it right than take short cuts.
 
Top