• Welcome to the CaliforniaSpecial.com forums! - You are currently viewing the forums as a GUEST. To take advantage of all our site features, please take a moment to join our community! It's fast, simple and absolutely free.

    If you have problems registering or can't log into your account, please contact Admin.

    Please Note: If you are an existing member and your password no longer works, click here to reset it.

1968 My 68 GT/CS build has begun

Matstng

Well-known member
Joined
May 9, 2012
Messages
66
Location
Simi Valley, Ca.
I made room in the shop over the weekend and pushed it in. My plan is to reassemble the car so I can drive it minimizing the out of pocket expense. I'll likely temporaraly put the motor/trans into my conv to check it's condition while I do some detailing on the CS.

2012-06-24_16-35-51_815.jpg


2012-06-24_16-47-19_814.jpg


2012-06-24_16-46-15_572.jpg
 
Last edited:
OP
OP
Matstng

Matstng

Well-known member
Joined
May 9, 2012
Messages
66
Location
Simi Valley, Ca.
Made a little progress tonight. Pulled the motor and did a little assembly on the back end... assembled the lower panel and tail light panel. Hope to get the rear lights in early next week.
 
OP
OP
Matstng

Matstng

Well-known member
Joined
May 9, 2012
Messages
66
Location
Simi Valley, Ca.
Was able to do a little detailing to the engine bay. I can't re-install the motor without cleaning it up a little, Right?
2012-07-03_06-39-41_179.jpg


Here's a pic of the rear panel installed. I should be able to get the rear lights cleaned and fit tomorrow.
2012-06-27_20-30-30_850.jpg


I've put together my parts list and may place the BIG order in a week or two.
 

Mosesatm

Well-known member
Joined
Jan 18, 2005
Messages
9,177
Is that a test fit for the tail light panel or is it installed?
 
OP
OP
Matstng

Matstng

Well-known member
Joined
May 9, 2012
Messages
66
Location
Simi Valley, Ca.
Is that a test fit for the tail light panel or is it installed?

Test... Making sure I had all the screws and everything cleared.
Do you see something I need to address?

Do the hole filler panels mount from the inside or outside? Should they have any seam sealer on them?

I could use some help on the sequence things go on back there. Filler panels, light buckets?, panel, then lenses?
 

Mosesatm

Well-known member
Joined
Jan 18, 2005
Messages
9,177
On the last one I worked on I installed the tail light lenses and bezels on the panel off the car and assembled the entire panel as one unit.

The metal tail light covers are screwed on from the outside with a bead of sealant around the edges. On many GT/CSs the sealant is visible from inside the trunk where it squeezed out when the covers were installed.

Be sure to install the gas cap first because you won't get it through the hole after the panel is installed.
 
OP
OP
Matstng

Matstng

Well-known member
Joined
May 9, 2012
Messages
66
Location
Simi Valley, Ca.
On the last one I worked on I installed the tail light lenses and bezels on the panel off the car and assembled the entire panel as one unit.

The metal tail light covers are screwed on from the outside with a bead of sealant around the edges. On many GT/CSs the sealant is visible from inside the trunk where it squeezed out when the covers were installed.

Be sure to install the gas cap first because you won't get it through the hole after the panel is installed.

Thanks!
I'll be working on the rear panel assembly over the weekend. I got the gas cap and tail light bezels cleaned up last night and am very pleased with how much improvement you get with a little elbow grease.

The deeper I get into this, the more excited I get.
 
OP
OP
Matstng

Matstng

Well-known member
Joined
May 9, 2012
Messages
66
Location
Simi Valley, Ca.
After I helped my wife in the yard for a couple hours I was able to make some progress on the reassembly. I think It's cleaning up nicely.

2012-07-06_20-08-10_879.jpg


2012-07-06_20-24-09_434.jpg


I was also able to install the shocks, paint and install the inner fender shock/spring covers. Also joined the motor and trans so they're ready to drop in.
 
OP
OP
Matstng

Matstng

Well-known member
Joined
May 9, 2012
Messages
66
Location
Simi Valley, Ca.
Just washed it last night to put a cover over it. I think I've got a buyer for my Bronco but he wants it drivable so I need to jump on that project and put this aside for a while.

It looks like a car.
2012-07-09_19-59-37_155.jpg
 

franklinair

Well-known member
Joined
Mar 1, 2007
Messages
4,744
It looks fantastic!!
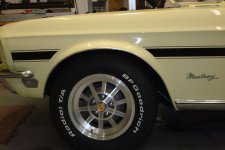
(Please do the wheels Argent, the way they're supposed to be.)

OR this way. Not really correct, but looks great!

Neil
 

Attachments

  • MEGAFILE 048.jpg
    MEGAFILE 048.jpg
    160.3 KB · Views: 33

di81977

Well-known member
Joined
Jan 15, 2006
Messages
446
It looks fantastic!!
(Please do the wheels Argent, the way they're supposed to be.)

OR this way. Not really correct, but looks great!

Neil

Wasn't body color with the snap on chrome accent pieces an option on the styled steel wheels?
 
OP
OP
Matstng

Matstng

Well-known member
Joined
May 9, 2012
Messages
66
Location
Simi Valley, Ca.
It looks fantastic!!
(Please do the wheels Argent, the way they're supposed to be.)

OR this way. Not really correct, but looks great!

Neil

The wheels will be Argent. :grin:
I'm planning putting the car mostly back to stock with the exception of a Wilwood disc upgrade on the front in place of the drums. Safety first, right?
 

Perkchiro

Well-known member
Joined
May 1, 2004
Messages
1,112
Location
Nixa, MO
Looks great Matt! Brings back memories of my restoration from 2003 to 2006. Yeah, it took me that long!
Steve
 
Top