• Welcome to the CaliforniaSpecial.com forums! - You are currently viewing the forums as a GUEST. To take advantage of all our site features, please take a moment to join our community! It's fast, simple and absolutely free.

    If you have problems registering or can't log into your account, please contact Admin.

    Please Note: If you are an existing member and your password no longer works, click here to reset it.

1968 Finally getting my HCS on the road again! - Startup procedure

admin

Staff member
Administrator
Joined
Aug 18, 2002
Messages
2,107
I've finally decided that it's time to either start working on my High Country Special or sell it. It's been sitting for an embarrassingly long time (8-9 years) without being started. I know, I know. I should be flogged and my membership card revoked! :embarass: You know that annoying guy in town who has the great car just sitting there being neglected? You ask him if he's going to sell it and he gets offended and tells you how he's going to restore it? Well, I'm that guy!

So anyway, I'm going to post my progress here as a way of keeping me motivated; hopefully with lots of photos. My plan is to get it running and safe to drive by April 2015 in time for Fab Fords Forever show at Knott's Berry Farm, CA. I'll trailer it out to the show (in all it's unrestored, surface rusted glory) and just see how it goes. I'm sure I'll get mixed reactions, but that doesn't bother me. It's really more of a deadline to keep me motivated and on track.

I'm sure many of you could get this car up and going in a week, but my work/family schedule simply doesn't allow me many hours to spare. So I'm taking baby steps and setting my goals low. Also, my 9 & 11 year old boys want to help, which I'm absolutely thrilled about! But it will slow down the process since I'll be teaching them as I go.

So, let's get down to it. What procedure do I use to get this car started and back on the road again after almost a decade of sitting? The car ran and all mechanics were in good working order when it was parked.

Here's my plan. Let me know what I'm missing:

  • New plugs, wires, cap, rotor, points & air filter.
  • Change oil & filter (although I'm thinking of doing this after getting the engine up and running. Let any sludge get pulled into the pan and drain it with the 1st oil change after just a few miles. Bad idea?)
  • Rebuild the carb. New fuel filter.
  • Drop the gas tank and inspect. (I used to put Stabil in the tank, but haven't done that for a few years. I'm sure the fuel is jelly by now.)
  • For the fuel line between tank and carb; should I pull it all out or can I somehow flush it out in place? I'm thinking I could cap one end and fill w/ starter fluid or carb cleaner and let sit overnight. Then blow out w/ compressed air.
  • New battery. Clean all connections. Inspect/replace cables.
  • New belts & hoses.
  • Drain/flush/replace coolant.
  • Check all other fluids (trans, brake, power steering)

As for the engine, I know some suggest pulling the plugs and spraying in Marvel Mystery oil in each cylinder and letting it sit for a while before turning the engine over for the 1st time. But I don't expect the engine to be seized up or anything. Again, I know the history of the car and I know it ran perfectly well when parked. When replacing the belts I'll turn the crank by hand. If it doesn't turn then I'll be more concerned and maybe go the Marvel route.

Should I do anything with the automatic transmission? Once I get it running I'll do a drain/flush/refill and new filter, but should I do anything before 1st startup other than check fluid level?

Is there anything I'm missing or any other tips? Thanks! I know you all will help keep me going on this project.:grin:
 
OP
OP
admin

admin

Staff member
Administrator
Joined
Aug 18, 2002
Messages
2,107
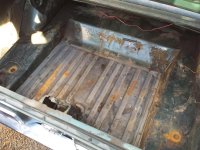
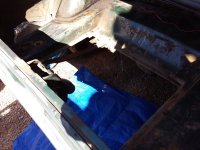
A few photos of where it sits now.

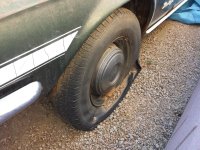
All 4 tires totally flat and won't hold air. :sad:
2015-01-18 10.28.12.jpg

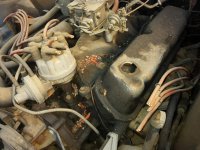
Bunnies got to my plug wires and had a little lunch. Luckily they seem to have left all the other wiring alone.
2015-01-18 10.25.49.jpg

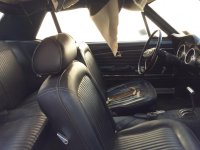
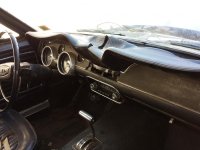
Half finished interior from a decade ago. I have a new in the box repop dash pad, but it's 12 yrs old. I haven't taken it out of the box recently, but it probably is almost as warped as the one in the car. :rolleyes:
2015-01-18 10.28.38.jpg 2015-01-18 10.29.03.jpg
 

stangfan

Well-known member
Joined
Jun 12, 2012
Messages
1,883
Location
Victoria BC Canada
I'm no mechanic, so I will leave all that to those who know. :grin:

Great idea to document your progress to keep the motivation up and the goal in sight. Keep at it Jon!! :cool:
 

Ruppstang

Well-known member
Joined
May 22, 2009
Messages
3,072
Jon good start, I would also cover the distributer and carburetor with plastic bags and spray everything with some Gunk engine cleaner then rinse it off. That will just make it nicer to work on. If you still have brakes I would bleed them. If not some new wheel cylinders or master cylinder may be needed. I may be able to help with some used interior parts if you would want to pay the shipping.
I am glad to hear that another one of the HCS brethren may be back on the road soon.
I will say the time spent with your boys will be worth more than you can imagine in 15 years.
Good luck, if you need help you know where to find us.
Marty
 
OP
OP
admin

admin

Staff member
Administrator
Joined
Aug 18, 2002
Messages
2,107
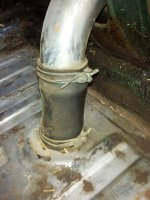
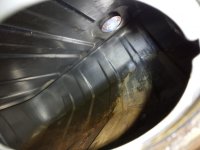
I did make some progress today. I removed the gas tank, which was bone dry. I don't know if the fuel just evaporated over several hot AZ summers or if I drained it at one point and simply forgot!

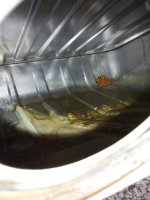
There's some build up, but not nearly as bad ad I expected. I don't think it will take much to clean it up.

Also, the tank has a drain in it. Does that mean it's a repop? I didn't think the factory tanks had drains built in.

2015-01-18 10.34.41.jpg 2015-01-18 11.20.38.jpg 2015-01-18 10.35.31.jpg


The inside of the tank has some scale and loose debris in it, but still looks very clean.
2015-01-18 11.10.08.jpg 2015-01-18 11.10.32.jpg


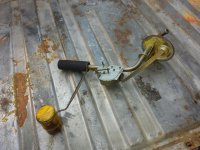
The float, filter and sending unit look good too.
2015-01-18 11.49.22.jpg
 
OP
OP
admin

admin

Staff member
Administrator
Joined
Aug 18, 2002
Messages
2,107
If you still have brakes I would bleed them. If not some new wheel cylinders or master cylinder may be needed. I may be able to help with some used interior parts if you would want to pay the shipping.
Hi Marty,

Yes, I'll definitely go through the brakes once the engine is running again. And thanks for the suggestion about de-gunking the engine bay. It definitely needs it.

Thanks also for the offer of interior parts! I'll have to take stock of what I need.
 

Ruppstang

Well-known member
Joined
May 22, 2009
Messages
3,072
That tank looks pretty new. The tank drain was a original feature. I would put a couple dozen nuts or a small chain and a Qt. of lacquer thinner then slosh it around a bit. Then drain it and let it dry. Lastly blow it or vacuum it out. I would just blow air through the line. Then after you have every thing installed and the tank filled leave the line off the carb and in a clear plastic bottle. Crank the engine to pump gas till there is no debris seen in it.
Marty
 

66hcs-conv

Well-known member
Joined
Apr 1, 2007
Messages
365
Jon,

Glad to see you are getting the car on the road again.

My .02 cents regarding starting the engine: Drain the old oil out before you try to start the engine. I like to remove the drain plug and the filter, then jack the right side of the car up so the oil runs to the left side of the oil pan.
This is assuming your drain plug is on the left (drivers) side. With the drain plug still removed, you can also pour a quart of new oil in the engine to kinda flush the oil pan. OR if your really ambitious, the oil pan can be removed and cleaned.

I also remove the valve covers and either vacuumed or somehow removed the chunks of dried oil.

A little motor oil or Marvel oil in each cylinder won't hurt. The cylinder walls have been with out any lubricant for many years.

Refill the engine, install new filter, and just crank it, to hopefully get some oil circulating before you try & start the engine. Just remove the rotor from the distributor cap.

Again my 2 cents.

I am in Phoenix for a while. Gimme a call if I can help. 480-883-3-one-43.

Dave
 

robert campbell

Well-known member
Joined
Apr 10, 2007
Messages
4,322
Jon,
I have used 3/4 minus sharp gravel in the tank. And lug huts have nice sharp edges and really go after the buildup! Get two of you and "shake shake shake" "Shake you booty"!! Turn the tank and get to all the edges. You can't shake to much. Use some lacquer thinner or mineral solvents as Marty suggested. Cycle the fuel sending unit up and down a few times to make the rheostat remember what it should do. Blow down the fuel line with compressed air and install an inline filter in front of the carb. Put 5 gallons of fresh gas in tank. Key on will let you see if the fuel gauge works. 5 gallons typically will barely register. I hope you sending unit seal is still ok?

As Dave suggested I would remove the plugs and get some oil in it. Automatic tranny fluid works great. It is super slippery and a great penetrating oil. You can't pour too much in. I would remove the valve covers and pour oil on the valves and rocker arms. Let engine sit for a day or so. Install some new rubber gaskets and as Dave suggested drain the oil and oil filter. Put in new oil and install new filter. I like to put in the hottest water I can get out of the tap into the radiator and even heat the oil a bit in front of a space heater or in hot water. Then do the next paragraph right after the oil and water are put in.

With the plugs still out test out your "new" battery and the starter. Short bursts of 30 seconds or so will work great. If your son is in the car, he may even see the oil pressure bounce just a bit. Burst it 5 to 10 times. This will prime the oil pump and circulated oil in the mains and cam bearings. While your at it you can hang a spark plug on a wire and see if it has spark! This will also fill the carb that you sent to me and had rebuilt and wet tested, for free.

Now put the plugs back in and cover the carb and wash the entire engine compartment. I am sure a bunch of ATF sprayed out the holes and all over the engine compartment. Gunk is really good (aggressive) stuff, but it will discolor paint. Keep it off the funders by washing thoroughly.

New points and a condenser are a good idea, but I bet the old plugs, rotor, and cap are just fine. Your spark plug wires look a bit short.....

Pull the tranny stick to see if you have any fluid. Same with Power Steering. Ensure you still have water in the radiator. Have funnel at the ready for tranny and ensure it is in park. No need to change fluid unless you have a problem. Be ready for possible "weapage" at the tranny front and rear seal as well as the rear main on the engine.

That bad boy will start right up!!! Of course the brakes, belts, and hoses. May consider a quart of "Trans X" fluid. Available at your local auto store.

http://jbtoolsales.com/crc-402015-6...-oz-12-pack/?gclid=CKv_x5zCoMMCFQpsfgodpUMAbA

Send the carb to:

Robert Campbell
3235 N.E. Fischer Court
Bremerton, WA. 98310

I would be honored to go through it!

Rob
 

BroadwayBlue

Well-known member
Joined
Apr 26, 2005
Messages
2,900
Location
Hudson Valley Area, NY
That's great to hear you're bringing the car back to like! :thumb:

Good luck and enjoy the process with your kids!

Looking forward to seeing the log of your progress.
 
OP
OP
admin

admin

Staff member
Administrator
Joined
Aug 18, 2002
Messages
2,107
As always, this group is the best! Thanks Dave for the offer to help. At the moment it's tough for me to schedule when I'll have time to work on her, but I'll keep you in mind.

Rob, thanks for your generous offer to rebuild my carb. I'll gladly take you up on it, but I may try starting it first. I have to get her started so I can move her into the garage.

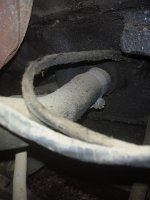
I made a little progress this week. I got 4 new tires put under her. I also cleaned out the gas tank per your suggestions. I used a wire brush on a stick first to reach in and knock most of the crusty stuff off. Then did the lacquer thinner shake-until-you-drop thing. For the fuel line I sprayed it full of carb cleaner and let it sit for a couple of days. Then blew it out with compressed air. Again, I was surprised at how little gunk was in there after all these years.

This weekend I'll reinstall the tank and start prepping the cylinders.

Thanks again for all the encouragement and tech help.
 
OP
OP
admin

admin

Staff member
Administrator
Joined
Aug 18, 2002
Messages
2,107
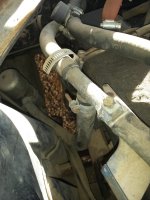
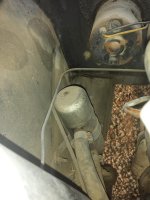
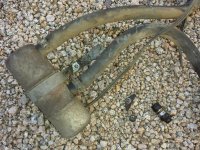
Today I reinstalled the gas tank, replaced the rubber fuel line and pulled the spark plugs. The cylinders are now marinating in ATF.

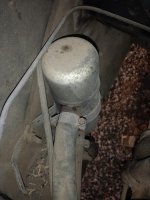
I also removed a block heater the original owner installed for the cold Colorado winters. Actually it's more of a coolant pre-heater. I was hoping to find some Ford part numbers on it, but no such luck. It was probably an aftermarket item from the 70's or 80's.
 

Attachments

  • 2015-01-25 14.49.21.jpg
    2015-01-25 14.49.21.jpg
    86.5 KB · Views: 47
  • 2015-01-25 14.58.18.jpg
    2015-01-25 14.58.18.jpg
    75.8 KB · Views: 48
  • 2015-01-25 14.49.29.jpg
    2015-01-25 14.49.29.jpg
    92.1 KB · Views: 48
  • 2015-01-25 14.49.11.jpg
    2015-01-25 14.49.11.jpg
    91.9 KB · Views: 46
  • 2015-01-25 15.34.55.jpg
    2015-01-25 15.34.55.jpg
    195 KB · Views: 44
Last edited:

robert campbell

Well-known member
Joined
Apr 10, 2007
Messages
4,322
I really like the cool gravel under your car!!! It is so Arid-zona!!! Hey it was 60 up here today. Just got back from a spin in the GNS and also warmed up the 1975 GT-750 2 Stroke Suzuki!!!

Rob
 
OP
OP
admin

admin

Staff member
Administrator
Joined
Aug 18, 2002
Messages
2,107
Yeah, our gravel yards hardly take any water at all!

It was in the mid 70's today. Perfect January weather to be out working on the Mustang.
twothumbsupgrin.gif
 

robert campbell

Well-known member
Joined
Apr 10, 2007
Messages
4,322
We have a friend in Manchester NH. Hope they are over predicting. Glad I am not you!!! 60 again today with bright sun!!!

Rob
 

68wsr

Member
Joined
Dec 29, 2013
Messages
8
Hi Jon,

It's great that you going to get the car running. I noticed in your engine pic you have a dual vacuum advance distributor. A word of caution about this dual vacuum advance system. The dual vacuum advance is a smog circuit. When the engine is just started and cold this circuit will retard the engine timing to make it warm up sooner. On my 289 2V one of the prior owners removed the distributor vacuum control valve and routed the vacuum lines incorrectly. The vacuum advance has two vacuum connections. One for advancing timing and one for retarding timing. On my engine the retard vacuum was connected to the intake manifold. This allowed the dual vacuum advance to retard engining timing continuously. Resulting in rough engine idle and improper engine timing thru the entire rpm range. I disabled the vacuum retard (vacuum port closest to distributor on the dual vacuum advance unit) by disconnecting vacuum line and plugging the vacuum retard port. The vacuum advance port is still connected to the intake manifold. My 289 2V now idles smooth and engine timing is correct. I recommend that you do the same if do not plan to keep the smog. If you plan to keep the smog, one must be precise about the smog set up. I checked the Ford shop manual for vacuum routing with smog set up. It depends on which smog system you have, auto trans or manual trans, with AC or without AC.

Daniel
68 HCS
 

robert campbell

Well-known member
Joined
Apr 10, 2007
Messages
4,322
+1 Daniel!
The vacuum tree near the termo housing is for the anomaly you mention. All needs to work properly or the engine timing is adversely affected.

I am with you. Block and plug this stuff. Make it as simple as possible.

Rob
 
Top